Additional Information:
Once you have learned some Visual Basic, it is theoretically possible to fill modules with lots of code, all of which may serve a useful function. However, if you have not learned how to define positions on a spreadsheet using range names, you will be forced to update all your code each and every time you move cells around your sheet. This may discourage you from improving your sheet once you have started using it.
The best approach to adopt is to assign range names to locations in your sheet such as Header, to work out which row number this corresponds to at the start of your macro, and then to use the row number to refer to individual cells within that row. The value of a row number in Visual Basic can be found using the instruction Range("RowName").Row. The value of a column can be round with Range("ColumnName").Column.
The Range command is used widely in VBA, and you may recognise its use from recorded macros where cells are referred to as Range("A1") or similar. Range("A1").Row would return a value of 1 as it refers to a cell in the first row. Note that the .Row/.Column commands can also be applied to individual cells, though this is of less frequent use.
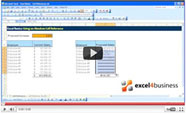
When you start creating a lot of ranges, it is important to be able to manage them. This video deals with range names in Excel 2003; in 2007 and 2010, you can view existing range names under Formulas->Name Manager.
Just as cells can shift around, sheets can change their names and locations within a workbook. Therefore you should use code names to refer to sheets. When you first open Excel, Sheet1 has the code name Sheet1. You can reference the temporary name using e.g. Sheets("Sheet1").Name, if you wanted to retrieve its name. The code name is much quicker to reference and takes the form Sheet1.Name. This video shows you how to change a sheet's code name.
If you accept that the data in your spreadsheet is going to evolve and you do not wish to review your macro each and every time something changes, you will need to ensure your macro can cope with the addition of data. If you are using simple loops, you may initially write them to cover 100 rows of data, or to stop when it encounters a blank row of data. The underlying assumptions may one day prove inadequate.
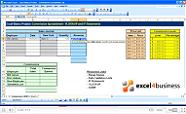
In this video we have decided that, although there are only 5 rows at present, there may one day be up to 1,000. Therefore we put the limit of our For/Next loop at 1,000 and use a separate IF statement to exit the loop once we reach the end of our data. We could have replaced the For/Next loop with a Do Loop e.g. Do Until Cells(RowNum, FirstCol) = "". Neither are wrong, and the time Excel spends administering the loop is negligible compared to the time it takes to place data into cells.


